Sunday, October 14, 2012

Long Time No Coffee Cake

Okay, life has changed a lot since I last wrote. There are no excuses for not writing, especially about food, but to give you an idea, I've graduated, gotten a full time job, commuted from the suburbs into Chicago, apartment hunted in Chicago, found an apartment only to show up to move in and the unit wasn't open, moved into a different unit, settled in, celebrated with friends and baked a whole lot of things.

I mean, let's talk about accomplishments. And that's not mentioning the other things that get me really pumped up, like my nieces birthdays, meeting my pen pal since elementary school for the first time, visiting my boyfriend in Georgia, my birthday, etc.

But mainly, this job thing has given me a new outlet for unleashing all that is baked and yummy. I ended up being asked to put my recipes in our company newsletter that I'm in charge of. So I've been writing about food in a whole other form in my job as an editor at YouSwoop.com and in sharing sweets throughout the company. 

This recipe I made after a really rough change in the company that I felt and I knew everyone would need a little pick me up the next Monday. I mean, Mondays are hard enough, right? So what better way to start them than with coffee cake.

This recipe was a Pinterest find from Domesticated Academic and I'm just a big fan of it. You can do this to create a regular coffee cake style in the round cake pan, or I did them in cupcake pans to create coffee cake muffins. Enjoy!

Strawberry Greek Yogurt Coffee Cake Muffins
Ingredients
  • For the butter cake and crumb topping:
    • 2 cups all-purpose flour
    • 1/2 cup sugar
    • 1/2 cup butter, cold and cut into pieces
    • 1/2 tsp baking soda
    • 1/2 tsp baking powder
    • 1/4 tsp salt
    • 3/4 cup non-fat, plain Greek yogurt
    • 1 large egg
    • 1 tsp vanilla extract
  •  Cream cheese filling
    • 4 ounces low-fat cream cheese
    • 1/2 cup non-fat Greek yogurt, plain
    • 1/4 cup sugar
    • 1 large egg
  • Strawberry filling
    • 1 1/2 cup fresh strawberries or frozen, cut into pieces or mashed if frozen
Instructions
  1. Preheat oven to 350 degrees Fahrenheit. Prepare muffin pans with liners or heavy duty baking spray. You can also use an eight-inch spring form pan with parchment paper. 
  2. Make the cream cheese filling: Beat the cream cheese and 1/2 cup Greek yogurt on medium speed until smooth. Add in the 1/4 cup of sugar and 1 egg and beat until well combined. Set aside.
  3. Make the butter cake: In another bowl, combine the 2 cups of flour and sugar. Using a pastry cutter or two forks, cut in the butter until the mixture resembles coarse crumbs. This will take a while.
  4. Measure 3/4 cup of the butter cake mixture and set aside. Add the baking soda, baking powder and salt and mix well.
  5. In another bowl, beat the 3/4 cup Greek yogurt, 1 egg and vanilla extract until well blended. Using a hand whisk or a spoon, stir gently into the flour mixture until just incorporated.
  6. Spread the batter in your pan with about 1/2 inch up the sides, like making a well. Pour the cream cheese mixture over the batter, being careful not to go beyond the border. Spread the strawberry pieces on top of the cream cheese mixture. Sprinkle the remaining 3/4 cup of cake crumbs over the strawberry filling.
  7. Bake for 50 to 55 minutes. Cool before removing from pan. Enjoy!


    The muffin forms are great to take to work, to a party, to friends or even for a bake sale. Feel free to share and eat them all up. You can even split the flour so it's half all purpose and half whole grain to make it a little bit more nutritious. Plus mix up the flavors of the fruit for different seasons. It's a great recipe to have on hand and enjoy all year long.

Monday, May 14, 2012

One Sweet Ride: The Whoopie Pie

After a long, sweaty work out a breath of cool fresh air is usually all I need to feel fresh and ready to face the rest of my day. But sometimes, just sometimes, you might need a little bit more. Lucky for me, that little bit more was sitting right across the street in a bright pink van with flaming sides. The back of the van even warned me that it would ruin my diet, but still - after running and lifting weights - I was willing to make that sacrifice.

This was my first in person encounter with Chicago's Mobile Bakery: Sweet Ride. Twitter recommended I should follow them, for my love of Flirty Cupcakes, but I was never able to make any of their stops before. I had practically given up checking up on their twitter and facebook accounts to see if our paths had crossed. Yet, this day they were right there in front of DePaul's student center in Lincoln Park. I couldn't pass up this opportunity - not with the bright pink colors and delicious cupcakes and treats to be had.

But get this, I didn't even get a cupcake. I know, right? I am such a cupcake girl. Of course that was my original intention, but I walked up and spoke to the woman running the truck. First off, she was sweet, friendly, helpful, and knew her sweet stuff very well. It was really great talking to someone like that and being able to ask what they would recommend and having that catered to what I wanted. She explained their options that included a very tempting sweet potato cupcake that was on Cupcake Wars and a red velvet whoopie pie. I've been a little bit skeptical about the whoopie pie craze that seems to be popping up in correlation to the love of cupcakes, but this one just seemed so tempting. Their red velvet is well known, she said, as well as was sold out in cupcake form. The whoopie pie was also heart shaped. I'm a sucker for anything heart shaped.

She also gave a great description of it having a cookie-like consistency with the cream cheese frosting in the center. It just seemed to be the perfect treat to grab before getting on the Metra train. I got one and took it to go. One of the great things about food trucks is how they're ready for you to take on the go, where ever you are and where ever you are going. The difficulty I had with this whoopie pie, though, is that I love to break cookies, muffins, and most baked things into pieces with my hands (if not large enough to eat with a fork). This idea did not work so well with the whoopie pie; it was something I should have guessed ahead of time. My fingers squished the red velvet top and bottom so that the frosting squished right out of the center.

Instead of continuing with my failed attempt, I decided to just dive right in. This bite brought me back to a great, childlike joy of going face first into food, not really caring how messy you might get and just purely enjoying what you're doing. It was wonderful too, since it really did remind me of a cookie. I ended up leaning onto a lot of child roots, and let's face it we still do it as adults, and twisted the top and bottom off like an Oreo. This way I could it the top, then the bottom, and get lots of cream cheese frosting in a higher ratio of taste per bite. Perhaps I might not have enjoyed the ratio (more red velvet cookie) if I had eaten it originally, but the fun of this whoopie pie is the childlike creativity you can have with it - that and the heart shape. While it was grainier than a typical cupcake, the whoopie pie had a great tradition red velvet taste that was rich and nicely blended. It made me even more tempted to go back and try their cupcakes.

The whoopie pies are a perfect treat for an on the go bite or for kids. I can see kids really loving twisting these open and licking them or being able to eat them in the stroller or the car. I believe the whoopie pie really does bring us back to a simple time where we can just enjoy something sweet without the stress of the world around us. Luckily, Sweet Ride is bringing this piece of joy around Chicago in a flaming pink van.

Let me know what you try via Sweet Ride and your favorite whoopie pies.

Sunday, April 1, 2012

Spring Break: Do You Fro-Yo?

Spring break has never been something for me where I've planned a long trip and I have to pack up and leave the moment finals are done. That is, until this year. I planned well ahead of time to visit my boyfriend in Athens, Georgia where he's going to the University of Georgia for graduate school.

Now, I love my boyfriend - obviously, I spent good money on a plane ticket to see him - but he is as picky as a five year old when it comes to food. He hates vegetables - will only eat corn, potatoes, and some peppers - and absolutely loathes onions with a fiery passion. I knew it would be a difficult trip eating wise, especially after getting so used to eating vegetables all the time by myself. But one of the best things about him is he will try new places to eat - which paid off when we saw Menchie's frozen yogurt.

In Georgetown square, which is the largest shopping center near him, we passed this brightly colored store. Stark white tables made the bright purple and kiwi green pop. It looked inviting with indoor and outdoor seating and a cute cartoon character as their logo. I wanted to try it. I couldn't help myself. I had heard and seen all of the frozen yogurt craze in Chicago, but the locations never looked as big or open or fun as this one did.

So one night for dinner we strolled in, grabbed a cup, and looked at the huge wall of selections for frozen yogurt flavors. Vanilla, chocolate, chocolate covered strawberry, Georgia peach, cake batter, Irish mint, blueberry, strawberry banana, there were so many that I had a hard time and could never pick just one. Luckily it's made for you to mix and match whatever you'd like. First time around I had cake batter swirled with strawberry banana. It's even more fun because flavors rotate and differ on the store, so it's an adventure every time!

The Boyfriend @ Menchie's

Then you stroll over to the long toppings counter. First are plastic bins like you'd see in a candy store, but in addition to candy they have cereal, sprinkles, nuts, pretzels, coconut, and any other dry toppings you might like to sprinkle on. Another lower set area of the toppings counter had fresh fruit, cookie dough pieces, cheesecake pieces, and cooler options to toss on. Then, of course, the end has silver containers where you can squeeze caramel, chocolate, fudge, or marshmallow toppings. Just the toppings bar made me feel like a child - wanting everything, but unable to choose. My strawberry banana cake batter was topped with fresh strawberries and cheesecake pieces. Besides the cake batter and cheesecake, this was a low-calorie and low-fat treat.

How it works is you put as much or as little of all the flavors and toppings into a bowl or a cone bowl and then, when you're done, you weigh it and pay around 42 cents per ounce. Let me tell you, it's more fun and cheaper than most ice cream shops. Brandon even loved it because he could avoid the fruits he thought were nasty and mix together a mint and chocolate treat with cookie dough pieces and caramel. He was just as giddy as I was picking out his flavors.

When I looked Menchie's up online I saw they have a smileage club. It's a rewards program you can join online or in store and use a rewards card or your phone number to get points for every dollar you spend. If you spend $6.78 you would get 6.78 points - they do everything down to the penny. Then when you reach 50 points you get $5 free. But for signing up you get 25 smile points and if you use your card within the first week of signing up you get another 10 points free. Of course, I did both those things to get 35 free smiles. Plus, I'm looking forward to my free frozen yogurt on my birthday.


The smileage club sent us back two more times to stock up on points and get our $5 free. I tried vanilla and georgia peach the next time - which was wonderful - and got georgia peach the next time too but with blueberry and marshmallow topping. It was always fun picking what flavors I wanted and what kind of dessert or treat I wanted. It could be fruity, healthy, dairy-free, or a thick tasty dessert.

For those of you who love options, trying new things, or have picky eaters that like to pick and choose, I'd recommend Menchie's frozen yogurt. While there's a lot of fro-yo out there, this place is friendly, well designed and just too cute.

Tuesday, March 20, 2012

Better than the Bahamas: Golden Rum Cake

St. Patrick's Day is known for it's drunken debauchery, but I am just not a fan of beer. I'd much rather spend the holiday trying out new boozy baking, so that's exactly what I did.

After having a rum cake at La Palma in Chicago, I desperately wanted to bake my own rum cake. I couldn't get enough about the sweet rum that keeps the whole cake moist, sweet and a little kick to it. I found this Golden Rum Cake Recipe at AllRecipes and convinced my boyfriend to let me make it when I visited him in Georgia. Truthfully, it wasn't that hard. Boozy cake on St. Patty's will always be welcomed.

Golden Rum Cake
via Allrecipe and Jackie Smith


Ingredients
    For Cake
 -  about 1 cup chopped walnuts
  - 1 package of yellow cake mix
  - 1 3.4 oz package instant vanilla pudding mix (I used the no sugar one)
  - 4 eggs
  - 1/2 cup water
  - 1/2 cup oil (vegetable is what is listed, I used a Smart Balance which is a blend of canola, soy and olive)
  - 1/2 cup dark rum (Got a little captain in ya?)

   For Glaze
  - 1/2 cup butter
  - 1/4 cup water
  - 1 cup white sugar
  - 1/2 cup dark rum

Directions
 1. Preheat oven to 325 degrees F. Grease and flour your Bundt pan - make sure it's thoroughly coated, I had problems with a part of mine sticking and breaking.
 2. Sprinkle the chopped walnuts over the bottom of the pan. You can use more/less walnuts depending on how much your pan can hold or how much you'd like.
 3. In a large bowl, combine the cake mix, pudding mix, eggs, 1/2 cup water, 1/2 cup oil and 1/2 cup rum. Blend well.
 4. Pour the batter into your pan over the chopped nuts.
 5. Bake for 60 minutes (checking periodically) on center rack until a toothpick or knife stuck in comes out clean. It'll be a nice light golden brown.
 6. Let the cake sit in the pan for 10 minutes, then flip onto a serving plate. Here's where you'll find out if you greased the pan enough. Mine stuck and I had to use a knife to loosen the edges up - and I still had it fall apart a bit.
 7. While the cake is cooking in the pan or on the serving plate, make the glaze. In a sauce pan, combine the 1/2 cup butter, 1/4 cup water and 1 cup of sugar. Bring to a boil over medium heat. Once boiling, continue boiling it for 5 minutes while stirring constantly. Remove from heat and stir in the 1/2 cup of rum.
 8. Brush glaze over the top and sides of the cake. Allow the cake to absorb the glaze so it gets moist and boozy. Continue glazing the cake until you use it all up or it's so glazey that it might fall apart. If any parts broke, use the glaze to help it stick together and get the glaze into the center of the cake
 9. Serve and Enjoy!

I made this cake in the afternoon and had it ready for late that night when my friend's came over. They had just been on a cruise to the Bahamas and were stopping by on their drive home. Even though they had rum cake in their bags, they wanted to try mine. In fact, they said it was better than the Bahamas' rum cake. This was probably one of the greatest compliments I've gotten.

So if you need a little boozy baking, or want to pretend you're in the Bahamas, try out this rum cake for a moist, sweet treat.

Thursday, March 15, 2012

How you say... motivation: Berry Streusel Bars

I often go through fits of saving recipes, e-mailing them to myself, or bookmarking the links to go back and bake them. Often, I forget about them or can't find what I want. This time, I purposefully went back in between studying to make a list of my top three low-calorie treats to try.

The winner of this batch was... Recipe.com's Streusel Strawberry Bars.

Ingredients
- 2 cups butter, softened
- 2 cups sugar (I used 1 cup of Splenda sugar blend)
- 2 eggs
- 4 cups of flour (I used whole wheat, but you can use all purpose)
- 1 cup of pecans
- 2 cups of preserves

Directions
1.  In a large bowl beat butter and sugar with an electric mixer until combined.
     Note: Due to our failure at having a mixer right now, I tried using a blender. This was tough. And we had to slowly let it into the blades to mix it together. This is why you need a mixer. You'll need to scrape the sides of either way you mix though to get it all together.
2. Beat in eggs.
3. You can either beat in some of the flour with the mixer, or do as I did and mix together the flour and pecans by hand. The note here is the mixture will be crumbly. I didn't notice this and mine was not crumbly, possibly due to a lack of flour. This isn't awful, but makes it difficult to set aside 2 cups of this mixture to crumble on top to make the layers.
4. Press the mixture into the bottom of an ungreased 13x9x2 inch pan or two different sized pans. I used a round cake pan and a longer oval pan so I could try using two different preserves.
5. Spread your preserves on top of the mixture to within 1/2 inch of the edges.
    If you listened to the directions to get the crumbly mixture, then you can sprinkle reserved mixture on top of the preserves to make the layers. If you failed, like I did, you can just go onto the next step and pray for the best.
6. Bake in preheated 350 degree oven for about 45 minutes or until golden brown. Cool on wire rack.
7. Either drizzle on top icing, or just put some powdered sugar on top, and cut into bars.

The oval strawberry one pre-baking
Their powdered sugar icing recipe:
   Combine 1 cup sifted powdered sugar, 1 tablespoon milk, and 1/4 teaspoon vanilla. Stir in additional milk, about a teaspoon at a time, until you get a drizzle consistency - so it's creamy, but able to let slowly drop from your spoon/fork/spatula.

I had a hard time with the consistency of the powdered sugar icing and the thicker mixture early on. Mine was more like a dough, which ended up being extremely tasty, but wasn't crumbly like before. Although it worried me at first, it was still really delicious, so don't be too worried if it isn't crumbly and you can't make that top layer.
Blueberry one pre-baking

I also may have had a delicious turn out because I used the best preserves I have ever had. The Thelen family farm in Wisconsin does the best jams and I used their strawberry and blueberry. They sell them on the road during the warmer weather as well as at Farmer's markets. I'm lucky enough to be related to them - so I can go picking strawberries with my aunt and watch as the jam making happens. A lot of hard work goes into them and it is the best. Smucker's ain't got nothing on the Thelens.


But if you need motivation, or just a sweet and fruity treat, these Berry Streusel Bars are a great treat that can feed a crowd or last all week.

Friday, March 9, 2012

Touchdown! Baking and Football.

The talk about bounties, draft picks, and Peyton Manning leaving all make me miss football season. There is nothing better than screaming your heart out as you try to coach your team through the television. I love everything about football and, as we all know, I love baking. This is why my baking adventures with my friend Ashley for the Super Bowl were some of the best.

This past year we created a collection of hand pies, sugar cookies, and brownies to keep the crowd fueled for cheering on the Giants. It seemed to do the trick. I mean, I couldn't stop eating them and from how quick they went I'm pretty sure I wasn't the only one.

The hand pies we were determined to do after Ashley texted me a picture of heart shaped ones. We thought it would be fun to do football shapes (with her new football cookie cutter set) and fill them with blue and red berry fillings. One set, our first attempt, was with canned cherry filling. I kept just eating the filling by itself, but it tasted even better in tiny crusts (despite the fact that the cherries were much bigger and the filling wanted to spill out). The hand pies are really easy to make with any kind of filling, canned or homemade. Ashley made a mixed berry one for our other batch that was heavenly.
via Foodista: similar to the ones that Inspired ours.

To make your hand pies just take premade pie dough and lay it out on top of wax paper and cut out whatever shapes you want. Make sure the shape you use has enough of a center to it to actually fit a good amount of filling though, or what's the point? This was difficult when we closed them up, because we wanted more filling than some of the football shapes could handle. Don't worry, I cleaned up the extra filling so it didn't go to waste. The best method to closing them that we found was to put one of the shapes on top of the other one after putting the filling on the lower one, then press down at the edges with your fingertips. Once they look sealed, use the tines of a fork to create the sealed pie edge look. It also looks nicer and gets crispier if you do a light egg wash over the top before tossing them in the oven.

The sugar cookies and brownies were boxed mixes that were spiced up by a few substitutions - such as the brownies had cola in them. The best part about that, though, was frosting our mini-jerseys. They were adorable and the butter cream frosting popped when we added the food coloring. It's kind of a fun, childish joy to frost the cookies with your friend, giggling as you lick your red (or blue) finger tips... and then the bowl.

Football and baking might not seem like your typical combination, but trust me, everyone enjoys something sweet and watching the game doesn't change that.

- Mollie

Tuesday, March 6, 2012

Browning Bananas and a Craving for Cookies

It's that time of the year when the snow begins to thaw, it starts to rain more, and we throw out that old pair of snow boots. Jackets get lighter. The sun shines more often. And the Girl Scouts set up their stands around town to sell cookies of all flavors. Sadly, I wasn't able to buy my Girl Scout cookies before Lent - where I gave up chocolate and candy. Now all I can do is drool over samoas and tagalongs from afar. This drooling has led me to craving cookies like the cookie monster.

This morning I discovered that our last two bananas were starting to turn brown. This is usually the key sign to make banana bread, but it didn't interest me as a baking adventure. I wanted something new. And I still desperately wanted cookies. This meant in between classes I would scour the internet for recipes (on cooking light, all recipes, real simple, and my recipes). I found a lot of awesome recipes, but this idea I fell in love with: Banana Oatmeal Cookies.

An episode of Good Eats got me into using Oats, especially for their health benefits. Plus I could make a healthier snack that didn't break my lenten promise - or hopefully my waistband. I set out later that night on a fun baking adventure adapted from this original recipe at all recipes.com.

Banana Oatmeal Cookies

Ingredients
 - 1 1/2 cups whole wheat flour
 - 1/2 teaspoon baking soda
 - 1 teaspoon salt
 - 1/4 teaspoon ground nutmeg
 - 3/4 teaspoon (generous) ground cinnamon
 - 1/2 cup plain greek yogurt
 - 1 teaspoon cornstarch
 - 1 cup sugar (I used splenda half and half blend, meaning I only used 1/2 cup)
 - 1 egg
 - 2 medium mashed bananas
 - 1 3/4 cups cooking oats
 - 1/2 cup pecans (or your favorite nuts, preferably chopped)

Directions
 1. Preheat oven to 400 degrees Fahrenheit. Grease baking sheets.
         Since we actually don't have any cookie sheets here right now (go figure), I used a mini cupcake pan and a pizza brick to hold my dough. The mini cupcake can made adorable little muffin shaped cookies. My sister called them muffins, but they're softer inside with a nice crunch outside.

2. In a medium bowl, add flour, baking soda, salt, nutmeg, and cinnamon.

3. Cream together the greek yogurt, cornstarch, and sugar.
          I decided to use greek yogurt instead of the 1 cup of shortening, to cut down on fat and give it a moist and soft texture inside. I found out that it's good to add cornstarch to your recipes from the Livestrong website for tips on baking with Greek yogurt. It keeps the yogurt soft and from clumping or really mixing up the texture of the baked goods. They also recommend keeping some of the original, such as butter or oil, but I just avoided that all together and went with all Greek yogurt. This is okay with cookies, but might not work as well for cakes.

4. Add egg, banana, oatmeal, and nuts to the mixture and mix well.
         This step was interesting since I don't have a stand mixer or a hand mixer. I started off doing step 3 in a small food processor. This worked fine until all this stuff was supposed to get tossed in. The egg and banana were more important to get really blended - so I added them into the food processor and got that mixed in while I added the oatmeal and nuts to the dry mixture.

5. Mix together the wet and dry ingredients.
        This is where it was fine for me using the small food processor. It all gets put together. Of course, it may have taken me longer to get everything incorporated, it works if you would like to focus on the egg and banana in the wet mixture and the oatmeal and nuts in the dry. They are combined very quickly.

6. Drop by teaspoon fulls onto cookie sheet - or into a mini cupcake pan. Or whatever way you feel like mixing up this recipe.

7. Bake at 400 for around 15 minutes, or until they just start to brown. For smaller cookies (or muffins) they end at 10 minutes, but the larger are about 15. Let them cool completely and store in a closed container to keep that moist banana flavor.


Trust me, this is a sweet treat you can keep coming back to and not feel bad about - either for a Lenten promise, your waistline, or your heart health.

- Mollie

Monday, February 27, 2012

Fat Tuesday: Paczki for Poland

"Fat Tuesday" is a day that emphasizes one of my sins: gluttony. I mean, I get to partake in eating everything and anything I can before I give something up for Lent. This year, though, I learned of a Polish tradition that I clung to in all of it's sugary, flaky, gluttonous deliciousness. The Paczki. (Pronounced: Poonch-key)

Paczki Day is usually a "Fat Thursday" type of thing in Poland, but has transferred through immigration and love of food to being incorporated into our "Fat Tuesday." This is almost a quite literal thing. In the 1600s in Poland the paczkis were made out of extra lards and meats that were going to be given up for Lent, the Chicago Tribune reported. Now, though, they're much more Americanized, sweetened and not just for the polish.

I'm grateful that I read the entirety of the Chicago Tribune article after I had eaten my paczkis. The explained how the batter is made out of three kinds of fat: butter, margarine and lard. It's a yeast-based dough that is deep fried in vegetable oil until golden brown.

But... it was totally worth it.

I made a trip in my hour between classes to one of my favorite Chicago Bakeries, Dinkel's, to stand in line and get four paczkis to share with my brother later Fat Tuesday Night. It was worth each minute, running to the "L" train only to miss it and walking into my writing course with baked goods.

The doughnut-like pastry is soft, light and has a beautiful sugary texture. It's this softness that makes you feel less guilty while devouring the entirety of a paczki. I mean, I couldn't help myself and ate a whole one with custard filling and chocolate frosting. The custard was smooth, creamy and added a density to the light pastry that holds it. The chocolate was a great touch of flavor and sweetness without overpowering the textures that make up the paczki. This was the same experience in the double chocolate, which has chocolate filling and chocolate frosting. It had a great combination of sweet and the soft pastry to not overwhelm your sweet tooth, but leave you craving more.

I also got a strawberry and a cinnamon-apple that were absolutely delicious. The strawberry had a typical kind of strawberry compote/filling that gooed out with that first bite. It had sugar sprinkled on top to go along with the natural sweetness and bring out the flavors. I gladly had sticky hands after picking at this one. The cinnamon-apple was impressive as well. The filling was almost like an apple pie filling, with a great mix of spices and that syrupy mix along with the actual apple chunks. The light sugar coating on the pastry also made you remember that it was a dessert and perfect for Fat Tuesday.

Dinkel's was one of the easiest places to go, for me, to get the paczkis, but I really want to try some at a real polish bakery. Next year. Or after Easter? Who knows. But Dinkel's did have a great selection of flavors in addition to the four I got. Some of them included: pineapple, cherry, raspberry, lemon, plum, apricot and custard.

If you're looking for paczkis I found the chicagoist's article helpful - my ex-boss sent it to me when she found out about my hunt. And even if you have to wait a whole year to try them, give them a shot. They are worth the calories, sugar intake and possible gluttony.

- Mollie

Monday, February 20, 2012

London Cravings: Bread and Butter Pudding

So maybe for other people bread and butter pudding is a staple or a basic dessert or something their mother made them or something they tried once, but for me it's a London memory. When I get all gooey and miss London, I also think of bread and butter pudding.

I had never, ever tried it until my 22nd birthday. Nicole made a large sheet of it, which I refused to stop eating even though A) it was hot, B) I was drinking rum, and C) I didn't have utensils. Hands in. Eventually they got me away from it, but it was a perfect breakfast the next morning and became the staple for when all our feminine hormones were running wild.

Which, you'll understand, since we start off with this lovely selection of chopped Cadbury chocolate, typically Dairy Milk. A bar or two will work, depending on how chocolatey you want it. Chocolate chips work as well.

The oven should be preheated to around 375 to 400 degrees Fahrenheit depending on your oven (We had it 200 degrees Celsius). You should have a brownie type pan, either a 9x13 or a square one. We had the rectangle one in London with edges that weren't straight up and down, but Nicole said it worked better in her larger square one at home. Make sure this pan is sprayed with something so the chocolate and everything doesn't stick.

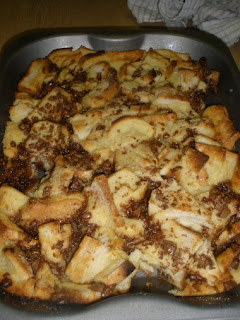
Layer the bottom of the pan with around 6 slices of white bread (you can use others, but Nicole suggests white) cut into quarters. Although some of the sides may overlap it will bake fuller if they're in a single layer and will rise more like a cake. If you want more bread and don't care how it looks, feel free to have around a quarter of an inch of each piece on top of the others. Ours was a little more haphazard due to our excitement and need for speed (as you can see on the right).

In a large bowl mix together half a cup of heavy cream, 2 cups of milk, 3 eggs, and a teaspoon of vanilla. Once mixed dump that on top of the pan full of bread and make sure it gets across the entire pan. You'll want to shift it around or press any pieces down to try and get it all to soak up into the bread. Sprinkle chocolate on top and let it sit for around 10 minutes. We were always in a rush to eat it, so we never let it get that way, but it'll cook more evenly if soaked into the bread.

Then dust the top evenly with granulated sugar and bake it for 35 to 40 minutes or until it's nice and golden brown.

You can serve it up in slices or sit with your good friends and eat it straight from the pan with spoons. Just be careful, it's hot! The best parts are the gooey bits where the chocolate has pooled together when it melted. You'll get a rush of sugar there. You can also do a raisin and rum version with cinnamon and nutmeg - just take out the chocolate.

Now go and enjoy a taste of my London experience.

- Mollie


For easier access...


Bread and Butter Pudding Recipe:

Ingredients:
- about 6 slices of bread (white preferred, but feel free to experiment with the flavors you love)
- 1/2 cup heavy/double cream
- 2 cups milk
- 3 eggs
- 1 teaspoon vanilla
- 1 to 2 bars of chocolate or chocolate chips (depending on preference)
- granulated sugar

Instructions:
1) Chop up bars of chocolate (if you did bars). Preheat oven to 375-400 degrees.
2) Coat brownie pan with cooking spray, can be 13x9 or square.
3) Quarter the slices of bread and place in a layer on the pan.
4) Mix together the cream, milk, eggs, and vanilla in large mixing bowl. Once completely mixed pour on top of bread in the pan, coating the bread as evenly as possible.
5) Sprinkle chopped chocolate or chocolate chips evenly across pan. Let this rest for around 10 minutes.
6) Dust a layer of granulated sugar across the top of pan.
7) Bake for 35-40 minutes or until just golden brown.

8) Devour

Friday, February 17, 2012

Nothing Says Love More Than...

 I have always loved Valentine's Day. It didn't matter if I was five years old with paper princess valentine's cards, a teenager with no hopes of a boyfriend, or a girl head-over-heels. Valentine's Day is all about love, of all kinds.

I fell in love the moment I stepped into Anna Shea Chocolates and Lounge last weekend. I could have spent all day there and emptied my bank account. This place is a chocolate lover's dream. For now, though, I'll focus on my first trip to the lounge where I was treated to a hand dipped chocolate covered strawberry and Red Velvet hot chocolate.

The whole place was ready for Valentine's day - since it was the weekend before the celebration of chocolate, reds, pinks, and fluffy love. My jaw practically dropped when we were brought a plate with these two large strawberries dipped in chocolate and decorated with silver and gold hearts and swirls. Not only that, but my red velvet hot chocolate came in this adorable cupcake mug. Being the cupcake fanatic I am, I wanted to walk out of the store with it. (of course I didn't though! I'm not a thief!)


The chocolate covered strawberries were almost too beautiful to bite into. We sat beside the glass window in the lounge where you can watch their chocolatiers creating the chocolates and baked goods as you ate. It was behind that glass, not that long ago, that those strawberries were just being dipped and decorated. It has a very sophisticated feel to it, knowing that as you take that first succulent bite. Oh and it was succulent. The strawberries were still juicy and fresh beneath that thick layer of chocolate coating. The chocolate was solid, making me nervous about breaking into and biting it, but it wasn't too thick to overwhelm the strawberry itself. The nice fact was that it felt fresh and not like it had been hardened, frozen, and kept around for quite a while. The chocolate was solid, but I didn't actually break my teeth biting down on it. It was more like a solid piece of chocolate outside the sweet berry. Not to mention the designs made it practically a work of art.

Let's not forget the real surprise out of this adventure though: the red velvet hot chocolate.
First off, I have never, ever had red velvet hot chocolate. I needed to try it. It was a Valentine's special, since red velvet is always the biggest seller and real heart of the baked goods when it comes to Valentine's day (I mean it combines cake, a bit of cocoa, and that bright festive red color, it's just perfect).

I was surprised how nice the flavors melded together though. It wasn't strange, like some of the reactions I got when I told people about it. It was like drinking hot cocoa, but it had this great rich, velvety flavor that blended alongside the actual chocolate. I couldn't get over the pink whipped cream either - it was a great touch to add to the red velvet touch. At one point while sipping I got a little marshmallow, which I didn't know was in there at first, and thought to myself "A red velvet marshmallow?!" It was blended so well with the hot chocolate and the red velvet flavoring that I was truly impressed. The whipped cream wasn't overwhelming either - like it can be in frappuccino or a milkshake. Instead it was a creamy, smooth texture that cooled the warm drink and created this great combination of flavors on your tongue.

I was in chocolate heaven at Anna Shea's Chocolates and Lounge. I'll write about them again, but be sure to check them out for fun and festive treats such as these. The red velvet hot chocolate may have to wait until next Valentine's, but it was my favorite treat this Valentine's Day. Let me know what your favorite Valentine's or holiday treat is so I can try it out.

- Mollie

Friday, February 10, 2012

From London to Home: Making Crepes

I don't know what sounds more fancy and romantic than crepes. Most people don't know how to pronounce it or pronounce it differently and it can come in all types and flavors. A crepe is the kind of thing you just fantasize about, that is if you're a foodie and especially those of us who love sweet crepes. Sweet crepes are wonderful because you can use all types of fruits, you can have chocolate, you can have Nutella, it will mold and adapt to your ever changing longings and urges. Really, crepes are like a really caring lover. They can be whatever you want them to be.

Perhaps that's an obnoxious comparison, but my friend Nicole showed me in London how versatile crepes can be and taught me the tricks her mother taught her. We started off with a savory crepe for dinner one night. It involved a cheese sauce, bacon, chicken, and mushrooms. All of that wrapped inside a thin crepe like a burrito, with more cheese sauce poured on top, and then baked in the oven. It was savory. It was filling. It was meaty. It was delicious. I was skeptical at first, due to my lack of knowledge in the savory crepe area, but it was wonderful.

But, of course, I still wanted sweet crepes.

After a night of Wicked and magic and tears, they came. Nutella and banana all rolled up inside the thin beautiful crepes. I could barely stop myself from eating them. I had to have the recipe. I promised my family to make them crepes the moment I got home after watching Nicole.

Although I am not, and will never be, the pro crepe flipper that Nicole is... I wanted to make them. I ignored the fact that I would never be able to flip the crepe using just the skillet and a little fancy wrist movement. It was something even Nicole took a while learning. Instead I got the recipe and made them for my family. They were instantly full on one crepe, unlike myself, but loved the combination of chocolate, hazelnut, and banana.

The beauty of the crepe is that you can adjust it, so here I'll post the basis for the actual crepe and you can feel free to fill it with whatever you want, whenever you want.

French Crepes
original recipe from lifestyle food

Ingredients:
- 1 1/4 cups all purpose flour
- 3 eggs, lightly beaten
- 1 1/2 cups milk
- 1 tablespoon butter, melted

Directions:
1) The recipe calls to sift the flour with a pinch of salt, I was bad and didn't sift, but this might make for a lighter, fluffier crepe if you want to give it a shot. Otherwise just a pinch of salt tossed into the flour was my attempt and it wasn't bad.
2) Make a well in the center of the dry ingredients and pour in eggs and milk. Use a whisk to draw together the ingredients slowly and whisk together.
3) Add in melted butter, cover, and set aside. The recipe says to set aside for an hour, but every time we've done it we only let it sit for a few minutes or so. I don't think it hurts it to start earlier, but may lead to a fluffier, lighter version if you give it the time it asks for.
4) Grease a frying pan or crepe pan with butter or some cooking spray.
5) Pour in just enough batter to thinly coat the surface of the pan. Be careful! It's very easy to pour in too much which will make flipping harder and the crepe into more of a heavy pancake (which may be what happened to the ones I made for my family and why they could only eat one). Pour off any excess that you can.
6) Let it cook for about 1 minute until bubbles appear in the batter.
7) Flip the crepe and let the other side cook for another minute or so.
8) Remove crepe from pan, placing on hot plate and continue until all your batter is used up. Stack the crepes on top of each other flat while you are making the others.
9) Have fun mixing up ingredients and rolling them up or folding them into quarters. Try sprinkling some powdered sugar on top or adding a squirt of lemon juice. The flavoring is all up to you. Some of my favorite ingredients I've seen are: bananas, nutella, chocolate, strawberries, ice cream, whipped creme, blueberries, raisins, jams, marshmallows.


I think the real trick to the crepe is not to stress out too much. Although it seems fancy and scary, just have fun and be creative. If it doesn't flip right (I used a spatula and often found myself using other silly tools to help it flip evenly) try something else or start a new one. The batter is easy to make, so you can always do more. They'd make a really fun party food too with a selection of ingredients to put in the center. Just enjoy it and remember, the crepe will do whatever you want it to.

- Mollie

Sunday, January 29, 2012

Outsiders in London: Brownies


Outsider Tart - Wine and Cheese Festival
Of course, the moment I heard there was going to be a Chocolate Festival in London it was on my calendar. The main event for me was the baking demonstration with David from The Outsider Tart. I had tried their peanut butter cheesecake brownie at the Wine and Cheese Festival earlier in my London adventures and fell in love. I was determined when I saw they were doing a baking demonstration that I had to go.

Little did I know that this was an American bakery - until I googled it. Of all the things for me to fall in love with in London it was an American bakery. Funny, right?

The bakery was started when both Davids (David Lesniak and David Muniz) moved to London from New York. They started The Outsider Tart to bring American baked goods to the area, focusing on brownies, cupcakes, whoopie pies, and cookies. For them, it was about spreading recipes that had been passed down for generations and showing that baking can be accessible to everyone. For me, it was a taste of home.

The cooking demonstration was cold, wet, and we were all huddled in folding chairs in a large white tent. But it was worth every minute. The David who wasn't sick showed up and had the host of the festival help him create two of their favorite brownie recipes. The fun part was that he didn't take himself too seriously. Although they have their own pans made specially for them, he emphasized how anyone can bake and that you have to keep going no matter what gets thrown at you. He even forgot to add some liquor to one of the brownie batters until it was in the pan, but that didn't faze him.


He made a chocolate-cherry cheesecake brownie that was prime competition for their peanut butter cheesecake brownie. The brownie and cheesecake were mixed together in this beautiful soft meld of flavors. I think their real trick is that when swirling together the cheesecake and the brownie mix it's very simple and light. You aren't supposed to shove the knife in and swirl it dramatically - as I know I do to try and get that marbled look. Instead he emphasized a light drawing of the knife back and forth across the plan and finishing there. Don't go back again. Don't play with it. Don't try to be too creative. This way the brownie batter is still mostly at the bottom, but you get a nice moist mix of the two to give it that mix of flavors.

These brownies were so good that I was begging for more, literally. They had trays of samples for everyone and the leftovers I called out and asked for. When it comes to brownies this good, you can be greedy.

I now desperately want their new book Baked in America. It can be ordered online at their website, through Amazon, or picked up at their store. If you're in London stop by their store. I was really disappointed I didn't go, but was at least able to take advantage of seeing them at the two food festivals. Back in America, I still want their recipes. There's 120 in their new book too and I can not stop drooling over the cheesecake brownies.

Perhaps it's the taste of home for another outsider in London that drew me to them, but that doesn't decrease the deliciousness of these baked goods.
- Mollie

Sunday, January 22, 2012

Never Too Many Turtles

My sister's boyfriend has stated that he would trade her for Turtles - that's just how much he loves them. From then on there has been an overwhelming love for and joking about Turtles in my family. This is why when I got my daily My Recipe cookie recipe e-mailed to me, I sent this one straight to my sister and swore I'd make them when I got home.

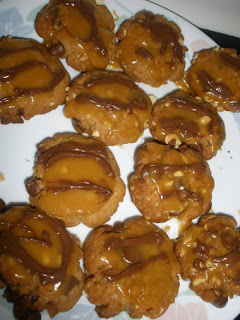
Peanut Butter-Toffee Turtle Cookies.

Just take that in.
Peanut Butter. Toffee. Peanuts. Chocolate. Caramel. All of that sweet indulgence packed into a little cookie. If you aren't drooling on your keyboard yet, I'm not doing my job - or you're allergic to peanuts.

I had to hide these cookies to be able to bring some to Christmas Eve - where they were quickly and thoroughly devoured. Although a lot of intricate work with the tough peanut butter dough and spreading the chocolate, these cookies are worth every inch of frustration I put into them. So here we go...

Peanut Butter Toffee Turtle Cookies
 recipe from Southern Living
 
Ingredients
  1/2 cup unsalted butter - softened
  1/2 cup sugar
  1/2 cup light brown sugar - firmly packed
  2/3 cup creamy peanut butter
  1 large egg
  2 cups Bisquick Baking Mix (If you have it: If not use a substitute = 2 cups of flour, 3 teaspoons baking powder, 1/2 teaspoon salt, 2 tablespoons Crisco. Mix everything except the Crisco and then cut Crisco into the mix. This makes the full 2 cup substitute and I think it's even better than Bisquick)
  2/3 cup toffee bits
  2/3 cup coarsely chopped peanuts
  2/3 cup milk chocolate chips
  10 ounces of vanilla caramels (approx.)
  2 - 3 tablespoons whipping cream
  1/2 teaspoon vanilla
  2/3 cup milk chocolate chips, melted (save the melting till after the cookies are baking/cooling)

Instructions

1. Preheat oven to 350 degrees.

2. Beat together softened butter, sugar, light brown sugar, and peanut butter on medium speed until nice and creamy. Add the egg and beat until blended.

3. Add Bisquick or Bisquick substitute at slow speed until just mixed together.

4. Stir in toffee bits, chopped peanuts, and 2/3 cup of chocolate chips.

5. Drop by spoonfuls onto your baking sheet and flatten it with your hand. I used my hands to round them out as well, but be careful they'll fall apart easily and the dough is a bit crumblier than say sugar cookie dough. The peanut butter and all the bits make it a bit difficult, but be patient.

6. Bake cookies at 350 degrees for about 10 to 12 minutes. Watch these carefully and know your oven, they want to be just golden and not with burnt bottoms. Cool and put on plates, a wire rack, something away from the oven to finish off the cooling.

7. Microwave caramels and the 2 tablespoons whipping cream in a bowl at high heat for 1 minute. Stir. Microwave in 30 second intervals, stirring after, until the caramels melt completely and it's nice and smooth. If it's still thick add more whipping cream and continue with the 30 second intervals.

8. Stir the vanilla into the caramel mixture. Then spoon the mixture evenly on top of cookies. Be careful, because you don't want too much to run all over the kitchen, but you want to be able to spread it evenly across.

9. Drizzle across the top with melted chocolate.
   Although this sounds like the easiest step, trust me, it was the worst. My chocolate wanted to cool and harden much faster than I could get it on the cookies. It also didn't want to drip nicely off the spoon, knife, chopstick, every utensil I tried to use to get the nice drizzle affect. I think using milk chocolate makes this very different - I think mine were semi-sweet and that has a different consistency. So be prepared and maybe even use chocolate made for drizzling if you want them to look really nice. You can see mine are a bit lumpy.

These cookies were rich, full of flavors, and a surprising delight for our Christmas celebrations. I think I might make them for Valentines day as well, they're that good and show the love you put in.

So if you've been offered in exchange for turtles, show them you're worth more and make your own turtle cookies - I'm sure it'll raise your value double if not tenfold. Enjoy!

- Mollie

Monday, January 16, 2012

Rudolph the Red-Nosed Cookie

Christmas is all about giving and thinking about others, so why can't we incorporate a whole lot of cute into the giving?

At least, that was my thought when my mom asked me to bake her some cookies to take to work. My sister joined in the request. So now I had two workplaces expecting Christmas cookies. I had to do something different, something people will enjoy, something fun, something that will stand out.

That was when I was e-mailed via myrecipes.com newsletter a Rudolph Christmas Sugar cookie recipe. The reindeer shaped cookies were cute and fun. Chocolate chips, pretzels, sugar cookies, who wouldn't love all these things? It was given the mother stamp of approval and I started to plan.

The original recipe calls for just using plain, refrigerated sugar cookie dough. I'm not really a refrigerated sugar cookie dough girl, unless that dough is made by my own hands. So I dug into my Allrecipes.com stockpile to pull out The Best Rolled Sugar Cookies recipe.

No really. That's what the recipe is called. That made me giggle the first time I saw it, but it isn't false advertising. Although you want to be sure to refrigerate it for quite a while (I did mine overnight) these sugar cookies are fantastic and easier to maneuver than most.

The Best Rolled Sugar Cookies

Ingredients
1 1/2 cups butter, softened (feel free to do half butter, half margarine, that's what I usually do)
 2 cups white granulated sugar
 4 eggs
 1 teaspoon vanilla extract
 5 cups all-purpose flour
 2 teaspoons baking powder
 1 teaspoon salt

Directions
 1. In a large bowl, cream together the butter and sugar until smooth and creamy.

 2. Beat in eggs and vanilla. Slowly stir in the flour, baking powder, and salt. I recommend doing the flour cup by cup, since it's a lot.

 3. Cover and chill the dough in the refrigerator for at least an hour. (Recommended: Overnight.)


Now here my directions incorporate both the design of the reindeer cookies and the temperature and time of the sugar cookies. Feel free to use the sugar cookie recipe for just shapes or whatever else you'd like to do with it - it's extremely versatile. But for the reindeer you'll need pretzels (either alphabet shaped, twists, or something you can break into antler shapes), mini or regular sized chocolate chips, and red cinnamon candies or red m&ms.

4. Preheat the oven to 400 degrees Fahrenheit.

5. Flour the surface and flour your hands. If you like it extra sugary feel free to use a little powdered sugar in your hands while you knead the dough. Roll out the dough to about 1/4 inch thickness - estimate it, just so it's not super thick.

6. Cut out the dough using a 3-inch round cookie cutter. Places circles two inches apart on a baking sheet (using either parchment paper or a quick spray on the sheet).

7. Now here's the hard part. Pinch about 2/3rds down the circle with your fingers to shape the face. It should be kind of hour-glassy. Look at photos to get an idea for the shape, then have fun - they don't have to be anatomically correct.

8. Break your pretzels into antler shapes. This is frustrating. I used a knife, but wished I had bought the alphabet kinds to make those work. Whatever you find that will work best, go with it.

9. Bake on higher rack for 6 to 8 minutes or until the sides are just lightly browned.

10. Remove from oven and let cool for 1 minute. Place on a rack or somewhere to cool. Here you have to carefully place the chocolate chips on. Make sure you get it right the first time and don't touch them. They will be a bit melty, but you need to put them on before the cookie completely cools so it can harden onto the face. Place a cinnamon candy or M&M at the bottom for the nose. Now cool them completely and enjoy.

Packaging up these cookies might be a little hard, but the people at work will devour them and talk about how cute they are. So really, all the fuss is totally worth it. My favorite part was biting into an eye and an antler at the same time with the sweet, the chocolate, and the salty pretzel all at once. Yum. Don't feel too bad either, you know it isn't the real Rudolph.

- Mollie

Saturday, January 14, 2012

Classic Christmas: Spritz Cookies

Although Christmas is over the first snow just hit Chicago and I don't know about you, but the white fluffy stuff makes me want to drink hot cocoa and bake Christmas cookies.

It was really strange not having a white Christmas, or even that cold of a Christmas, this year. I distracted myself with mountains of cookies, including my favorite and our classic Christmas cookie: The Spritz cookie.
These are the best to bring to parties, share with friends, and just snack on while working on wrapping presents, trimming the tree, and watching Christmas movies. I got the recipe when my mom bought me a cookie press at a Pampered Chef cookware party. I am in love with this cookie press and most people I know are jealous of mine. I'd recommend getting one, especially if you're always baking a ton of Christmas cookies and it takes too long. These are much faster than sugar cookies, just as sweet, and fun to decorate.

This year I used my sister's press (because who knows where mine went in the move) and we had Christmas ornaments, trees, wreaths, and stars to make with lots of colorful sprinkles. So here we go.


The Pampered Chef’s
Classic Spritz Cookies

Ingredients:
1 1/2 cups (3 sticks) butter or margarine, softened 
1 cup sugar 
 1 egg
1 teaspoon vanilla
3 1/2 cups all-purpose flour
Fun colored sugar or sprinkles to decorate!

 Directions:
 1. Preheat the oven to 375 degrees Fahrenheit. 

 2. In a large bowl, beat butter on medium speed until it's creamy.

 3. Add sugar, egg, and vanilla. Beat well until all are incorporated.

 4. Add flour 1 cup at a time, mixing well after each cup. Dough will be soft, don't worry, you want it this way. It will go into the cookie press easier.

 5. Push into cookie press or make dough into balls or other shapes. 
         For the cookie press you want to make sure once it's put together that the plunger part that presses the dough is forward so the dough is at the end and against the shape. Place the shaped side of the press on the cookie sheet and do roughly 2 clicks - depending on how hard/long you click the trigger.

6. Once you've filled a sheet, decorate with sugar or sprinkles. Have fun!

 7. Bake 10 to 12 minutes or until firm. I like to see the edges just barely browning - make sure they're on the top rack to avoid burnt bottoms.

 8. Cool on cookie rack or plate.

It should make 6-7 dozen cookies. Some presses are smaller, like my sister's, so you'll get mountains of them. The best part too? 2 cookies are 120 calories. Merry Christmas!

Okay, so they don't have to be Christmas cookies either, that's just become the staple in my house. If you have the press it also usually contains other fun, seasonal shapes. So whether it's Christmas joy, another celebration, or just enjoying life, these cookies are perfect for the occasion.

- Mollie